With the Total Sports Two Oceans Marathon in just a few days, it’s extremely important that you begin to tie off loose ends and bring the final days of your training together by planning your perfect Two Oceans Marathon race day strategy.
Important editors note: If you are running the Two Oceans Half Marathon, we have created a similar route and pacing guide for the 21k, and you can access that by clicking here.
In this article, we will have a detailed look at the Two Oceans ultramarathon route and the best way for you to tackle the course.

We will also cover exactly how you can calculate your perfect pacing strategy with a pacing chart that has been created just for you.
Let’s get started!
The Two Oceans Ultra Marathon: Detailed Route Guide
The Two Oceans Ultra Marathon is very simple. But of course, as we know, in life, simple doesn’t necessarily mean easy.
This year, the Two Oceans Ultra Marathon will not be a traditional mass start, gun-to-mat race. It will be a gun-to-mat, within each starting group of 1000 runners. Each starting group will get its own gross and net time and the gross time is the time that’ll count towards your official result.
With batches of plus-minus 1000 runners, it’s going to take seconds to get everyone across the line rather than taking minutes. (This is significant because it allows runners to get into their groove quite quickly)
One of the things about the Ultra Marathon is that it does begin in the dark, and runners tend to think the main road is flat… If you haven’t run Two Oceans before, everyone will tell you how easy the first half of two oceans is… this is not entirely true until you get through Wynberg.
There is a gradual but consistent climb that takes you through the first five kilometers of the race. And many runners have commented… “Wow, I’m already sweating and we’re only 5k’s into the race!”
So just be aware that those first five kilometers are going to be a little bit tougher than you remember if you’ve done it before. And if you haven’t done it before, way tougher than you anticipate.
From that point to around 14 kilometers, the route is quite easy, obviously, you are making up the elevation gain by losing it in the next five or six kilometers, but then the route becomes flat.
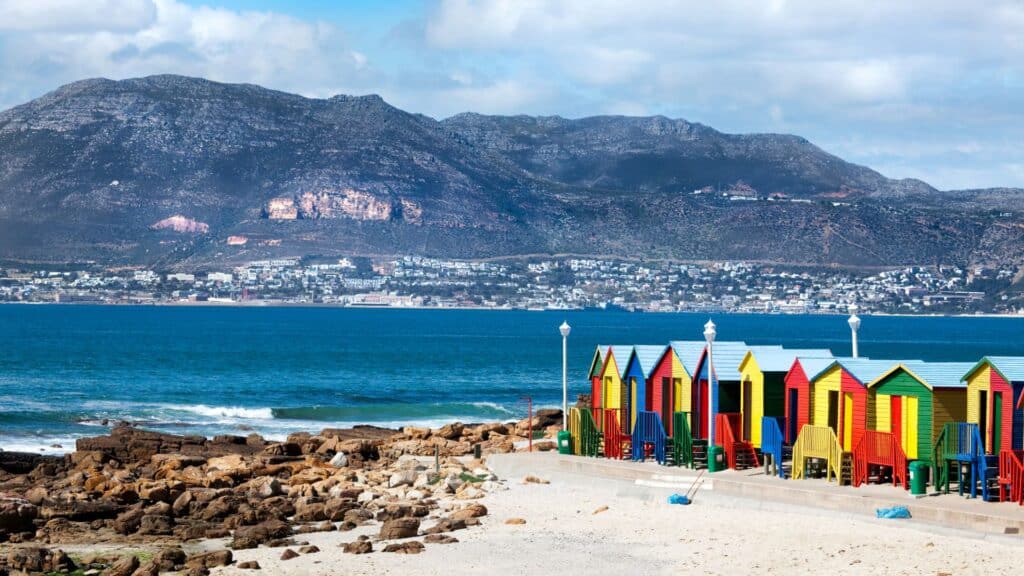
At around 14 kilometers runners reach Muizenberg where you can appreciate the scenery as the sun has risen and you get a beautiful view of the ocean.

Continuing through St James you arrive at Fish Hoek and sweep down into the first bit of significant work you need to do in the Ultra… The route takes you up towards the halfway mark and runners run through the residential suburbs of Fish Hoek, towards Noordhoek, you will cross past the Sun Valley Mall, and you will get to the Noordhoek village, which is at the 28k mark.
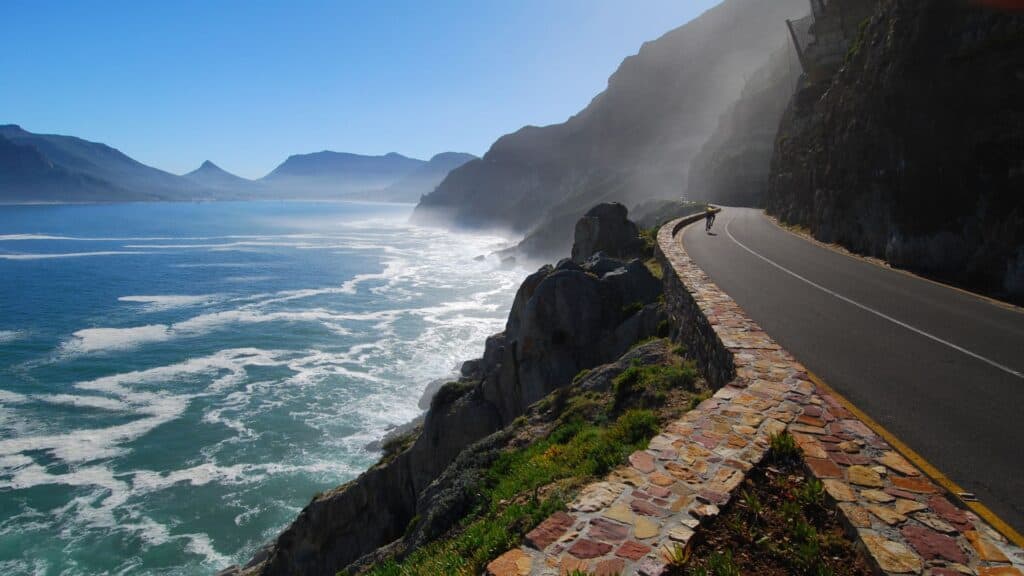
Immediately the real work of the Two Oceans Ultra begins, runners head onto Chapmans Peak, the first bit is “Little Chappies” and don’t be deceived here… you haven’t reached main Chappies yet. Little Chappies is about 1km of steep climbing but you do get about a kilometer of relief afterward before reaching the main climb of Chapmans Peak Drive.
Runners have a two-and-a-half kilometer climb which is steep and hard, remember just because you are feeling quite fresh here you do not have to push… save your legs as you still have a way to go.
It’s important to note that there is a “fake top” on Chapman’s Peak Drive, as you come out of the protective structure, a cement top with pillars, you will see what you think is the top of Chapman’s peak drive and it isn’t.
As you go around the corner, you will realize that this is the false top but you’ve got one more turn to go. The reward is worth it!
Once you crest the top of the hill, you sweep around and behold the beautiful sights of Hout Bay. It really is spectacular. One of the best views that you will get in road racing anywhere in the world.
Runners need to be careful from this point onwards because they have a very long downhill with quite steep camber. This can lead to them hurting their quads… the last 600 meters are cement and are the steepest.
Once you reach the Hout Bay flatter section, the route takes you up to the Hout Bay circle and you reach the 40 km mark.
Most runners think the climb only starts at the Marathon mark, however, it starts from the Houtbay circle
Constantia Neck is two kilometers of some of the hardest running you’re going to do in any road race anywhere in the world.
So you have to just take it as it comes. But remember that you should be saving your legs for the much easier section that comes for the last nine and a half kilometers.
Once runners reach Newlands Drive, it’s not all good news. Of course, the route gets much easier but by now everyone’s legs are tired and the camber here is renowned for getting to people with sore legs.
There are a few short hills with gradual downs so this section is easier and it is quite a pleasant stretch of road all the way to the 50K mark where Southern Cross Drive meets Newlands
Next runners will get a view of the Kirstenbosch top gate, this is significant because, from that point, there is a lot of downhill running that will take you to within 2 Km of the finish line.
There is a slight change on the Two Oceans Ultra route, in that when you leave Kirstenbosch’s top gate, traditionally, we would take the first left, but now you now continue on towards Bishops Court, where you do a U-turn. And it adds one more little climb into the mix, but it’s quite short.
Taking a right after the U-turn runners will head past Kirstenbosch bottom gate where they turn left onto the M3, up Chet’s Hill, they give their final push for 2 kilometers until they reach the grass at UCT and grab their finisher’s medals.
Now that we’ve run through the Two Oceans Ultra Marathon route, let’s have a look at how you would pace this race…
Perfect Pacing Strategy For The Two Oceans Ultra Marathon
This race is definitely not a case of smashing the first half as hard as you can to bank as much time…So you can lose it all in the second half. There is a clever way to run the Two Oceans Ultra Marathon successfully…

Two Oceans has a much easier first half compared to the second half but if you try to take too much advantage of the first half, you will be left with nothing in your tank for the second half.
It’s a self-fulfilling prophecy. If you go too hard in the first half you are absolutely going to have to give back most of the time, even if you weren’t running on such a tough second half of the route.
The thing is, it’s quite a tightrope…you don’t want to bank too much time. and you don’t want to be pushing yourself too hard in the second half.
So when you use our pacing charts, they really help you to know whether you are pushing too hard or haven’t gone quite fast enough through a particular section. So you can adjust your run as you are going.
The pacing chart takes into account literally every single kilometer of the route.
So the first two kilometers will set you up quite nicely, but then they take into account that there’s a 3k fairly tough pull that takes you into Wynberg…
The first five kilometers on the pacing chart don’t look like you picking up too much time, but from then on all the way to Boyes Drive… Which is about 17 kilometers. Here the pacing chart requires you to run a few seconds faster per kilometer to put some time in the bag.
Runners will reach Fish Hoek, where they save their legs from about 22 kilometers to 24 kilometers because it’s a tough section with a decent climb.
From here the route takes you to halfway fairly quickly.
Running this first part of the marathon this way doesn’t mean that we have pushed to Chapman’s Peak Drive and then we get there and are already struggling, it means that we are able to tackle Chapmans Peak positively feeling fresher than most.

You’re probably still going to be in the region of 30 or more seconds slower than the average pace required for your goal time when you’re going up at Chapmans Peak but very importantly, once you are over the peak and are heading downhill into Hout Bay, and we have built the chart to take the course into account.
In other words, we run the flats at slightly faster than the average pace required, we run the downs of certain gradients, faster, and we run the ups at a certain percentage slower.
By doing it this way, you save your quads and your shins, and you will be able to do what you need to do once you reach Newlands Avenue.
Some of the time that you’ve actually banked along the easy section in the first half is actually to protect you from having to run too hard down Chapmans Peak to make up for the time that you lost.
Once we hit halfway we just want to get into a rhythm and get ourselves to the marathon mark, at the marathon mark, you do want to have a little bit of a buffer over your average pace that you need to run for those final 14 kilometers, because Constantia Neck is an absolute exercise in saving energy and getting over the neck doing the least amount of damage possible.
That is the name of the game as you go up Constantia Neck, you will be close to 40 to 50 seconds slower going up the neck than you would against your average time required.
Once you get over the neck, you really want to try and get into that average pace required quite quickly.
For the next five to six kilometers, you want to be close to your average pace required for you to get your goal time.
Once you get to Kirstenbosch’s top gate you’ll have about 2.6 or 2.7 kilometers of really good downhill running where you can put some time in the bag, although you do need to be careful there because of the cumulative damage that your legs have taken over the previous 52 kilometers.
I find that even when I feel strong, there’s almost a line where if I go faster than 20sec/km faster than my ave required pace, my legs really want to cramp.
Ideally, you want between 15 and 30 seconds per kilometer above your average pace required to get you through those final 2 kilometers without being in too much of a panic.
Next, you turn left, hopefully, with a little bit of pressure reduced from the time you’ve just banked coming down from Kirstenbosch’s top gates, but also knowing that the finishing line is in sight. Here, you can go as fast as your legs allow you to go until you cross the finish line.
We’ve put together in a really simple-to-use interface if you’d like to download your own personal pacing chart. So let’s say, for example, you are hoping to run a 5:23 Two Oceans…
(These will be on sale at the Two Oceans Expo at the Coach Parry stand.)
You can put that into the pacing calculator, and it’ll work out exactly for what you need to do.


Comments are closed.